Treasure Island: Pirate Character Animation in Blender
A character animation with voiceover lipsync made in Blender based on the pirate story classic Treasure Island by Robert Louis Stevenson.
This animation visualizes an excerpt from chapter 28, "In the Enemy's Camp", in which pirate Captain John Silver gives a speech to protect the young Jim Hawkins from the treacherous pirates, after they find out it was Jim who ruined all their plans to acquire the treasure for themselves.
1. Character Design and Modeling
2. Character Rigging
3. Character Animation
4. Voiceover Lipsync
5. Animation Rendering in Blender
6. Animation Music
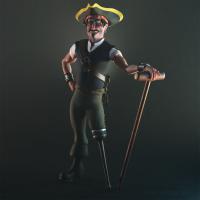
Project Notes
Character Design and Modeling
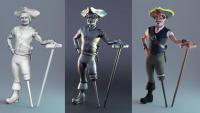 I kept the character as simple as possible, and aimed at a stylized design rather than photorealistic, to be efficient for animation and to reduce rendering times significantly. After planning the look with a simple concept in Krita, and sculpting it in Blender, I used Retopoflow 3, a Blender add-on by CG Cookie, to retopologize the character. You can always retopologize in Blender without add-ons but Retopoflow has some specialized tools to draw or relax polygons groups, which are perfect to create and tweak loops around deformation areas. If you work frequently in retopology it can probably save you a lot of time.
Character Rigging
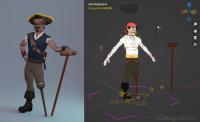 The rig used was a custom one I made years ago from scratch, and I further customized it for this character to match its structure and props. There is no need to create a custom rig when you can enable rigify in Blender, but a basic understanding of rigging can be useful when customizing character rigs, specially when there are accessories and props that need to animate well with the character or independently. In Blender you don't really need to have scripting knowledge to rig a character. I only used constraints and drivers in this animation project, which still allowed me to recreate anatomical mechanisms that were quite complex.
- 💡 Thoroughly test rigs before animation Test the character rig and every prop before starting to animate, specially if it is new or has been modified. Try all joint movements that the character will probably perform and also unplanned movements that are common. Have an efficient FK/IK switch for your needs. Make sure the props are handy to animate and that they can be aligned and controlled easily, without time-consuming jumps in space and unnecessary realignments when you switch parenting. If you work alone, all this testing will reduce interruptions required to fix the rig during the animation stage.
- 💡 Adding custom shapes is fundamental to keeping animation control bones organized and visually clear. I found Wayne Dixon's add-on for Blender, boneWidget, very useful to quickly set custom shapes that are clear and consistent. You can save a lot of time by just applying the default shapes to control bones in your rig, but you can also edit them to your liking. Wayne is a professional animator and rigger and is also great a teacher; this is one of his animation feedback sessions.
Character Animation
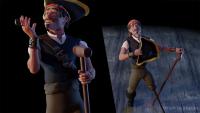 Blender recently incorporated more improvements to the animation tools. The breakdown tools for keyframes make inbetweening more intuitive and easier than before. You can now use a slider to create or tweak keyframes and match them to any or both neighboring keys in any degree, or to "relax" them. These tools are:
- Push Pose from Breakdown (Ctrl-E),
- Relax Pose to Breakdown (Alt-E),
- Blend to Neighbor (Shift-Alt-E), and
- Relax Pose to Rest Pose.
The video review software DJV was extremely helpful to check the frequent playblasts in each animation pass. You can scrub through animations, play backwards, zoom certain areas of the video, change playing speed, and find the exact frame number that you need to make notes about.
- 💡 Playblasts. When generating playblasts in Blender, you can enable Output Properties > Burn into Frame and select the metadata you want to see in your animation playblast. That way you can have the frame number burned into the video, and also the camera name or any other information that helps you when reviewing and working on the animation.
- 💡 Always work from general to specific. Make sure the key poses work and that they clearly convey the actions before any sort of tweening, and never start splining until the animation looks satisfactory enough in the stepped stage.
- 💡 Organize your keyframes Setting keyframe types was pretty handy to organize and visually identify the keyframes and breakdown poses. You can define a default type for the animation pass you are working on, or set a hotkey to switch between them quickly.
Voiceover Lipsync
Before animating, I recorded the speech of pirate John Silver in order to have a sense of timing for the animation, and guide the physical movements by the energy and pacing of the voice acting. After animating the body I proceeded to matching the facial expressions and mouth movements to the audio. As with any part of character animation, going from the general to the specific was also applicable to this stage in order to animate efficiently. 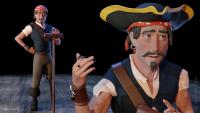 I relied on bone deformations and shape keys to produce the various facial expressions and mouth shapes. Since the goal was to keep the character simple and rendering times efficient, no bump maps or any kind of textures were used to produce the facial deformations. Besides, the performance was quite physical and called for longer shots, so there weren't many close-ups involved to justify a higher level of detail.
Rendering the Animation in Blender
 When I created the 3D model I intentionally avoided image textures to be able to render the animation faster, and I used Eevee, as the rendering engine in Blender, which allowed me to render at 3 seconds per frame in 1080p. Although the Cycles engine is the physically accurate one and makes lighting look awesome, for this stylized character look Eevee was perfect and rendering times were reduced by twenty times or more.
I used to render TIF sequences when creating videos, but recently I began using the OpenEXR format, with DWAA compression, which allows you to achieve optimal quality, with much smaller image sizes that consequently require smaller hard drives and produce less strain on your system.
Animation Music
I composed 2 music tracks for this project, although I only used part of them in the animation. You can listen to the full tracks in the Music section or here:
Thanks for watching the animation and checking this out.
Media (10)
 3D Character | John Silver - Original Design
 3D Character Animation | Treasure Island
 Pirate 3D Character Model | Sculpture - Topology
 3D Character made in Blender
 3D Character Rigging Controls and Topology | Custom Rig
 3D Character Model - John Silver Pirate Captain
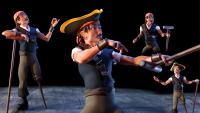 Character Animation | Pirate John Silver - Treasure Island


